Embeds v3
Content Management
While Alloy's mainstay is blogging, we've also incorporated an easy-to-use set of tools to allow you to embed content within your RapidWeaver projects. That embedded content can then be edited directly from your website using the same Alloy Editor we use for our Blog Posts.
In this section we'll explore the Embed tool and what it can do. We'll look at how we insert our embeddable content into our project as well as look at what each part of the Embed editor does. In addition we have a tutorial video above that will walk you through using Alloy's Embeds for your site.
Note: To follow along with the tutorial video you'll want to have already setup and published your Editor. This is covered in the Quick Start section of the documentation.
Embeds List
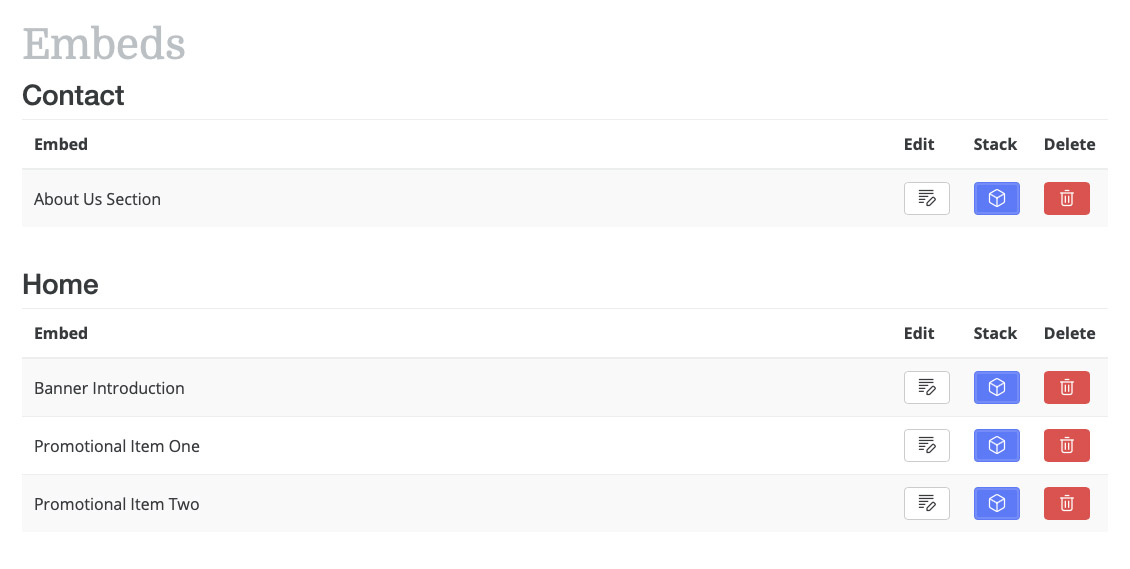
Much like the Posts List view for Blog Posts, the Embeds section has a list view of its own. This is where you'll find all of your site's Embeds.
List Sorting
Your Embeds are sorted by two criteria -- Firstly they're sorted alphabetically, but in addition they're also put into groups, which we call Pages. These Pages can be named whatever you like however. In fact they don't even need to be the names of pages on your site. You can name them whatever you like to help in your own organization of your Embed content. We'll look at these Pages later on when we look at adding and editing an Embed. We also discuss Pages in the tutorial video above.
RELATED
Interacting with Embeds
Each item in the Embeds List has a button for that allows to Edit the embedded content. This can be used to edit the contents of an Embed whether it is live and embedded on your site or not.

Our drag-and-drop system makes embedding content in RapidWeaver a breeze.
Drag-and-drop
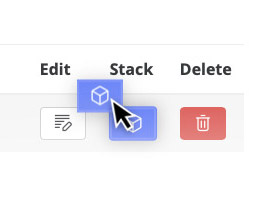
The Embeds List view also provides us a very important tool. In the list view we have a draggable item in the Stack column -- a small cube icon. This icon is what we use to embed our content into our RapidWeaver project file.
You'll drag this cube icon directly onto your Stacks page and drop it where you want your Embed to appear on your site. Once dropped it will magically turn into an Alloy Embed stack with a preset link to your Embedded content.
We cover how to insert Embeds into your project in the tutorial video above.
Deleting & Drafts
Similarly to Blog Posts you can also delete Embeds from this list view. When you click the Delete button it will prompt you to confirm the deletion of the Embed. Deleting an Embed CAN NOT BE UNDONE. Be sure you want to delete it before confirming.
Much like Blog Posts, Embeds can be in a sort of Draft mode. If an Embed is disabled a small icon on an eye with a slash through it will be displayed to the left of the Embed's title in the list view, as well as the title will be greyed out.
Adding & Editing Embeds
While Embeds might be easy setup and use, they're also quite powerful. Embeds consist of just a few fields, but can make managing our page's content simple and easy.
To get started we have an "Add New Embed" button in the top right of our Embeds List View that allows us to add a new Embed to the Editor for use in our site.
Let's take a look at the fields we'll use to create an Embed, below. Don't forget we also have a tutorial video above that walks you through creating and managing your Embeds as well.
ACTIVE TOGGLE
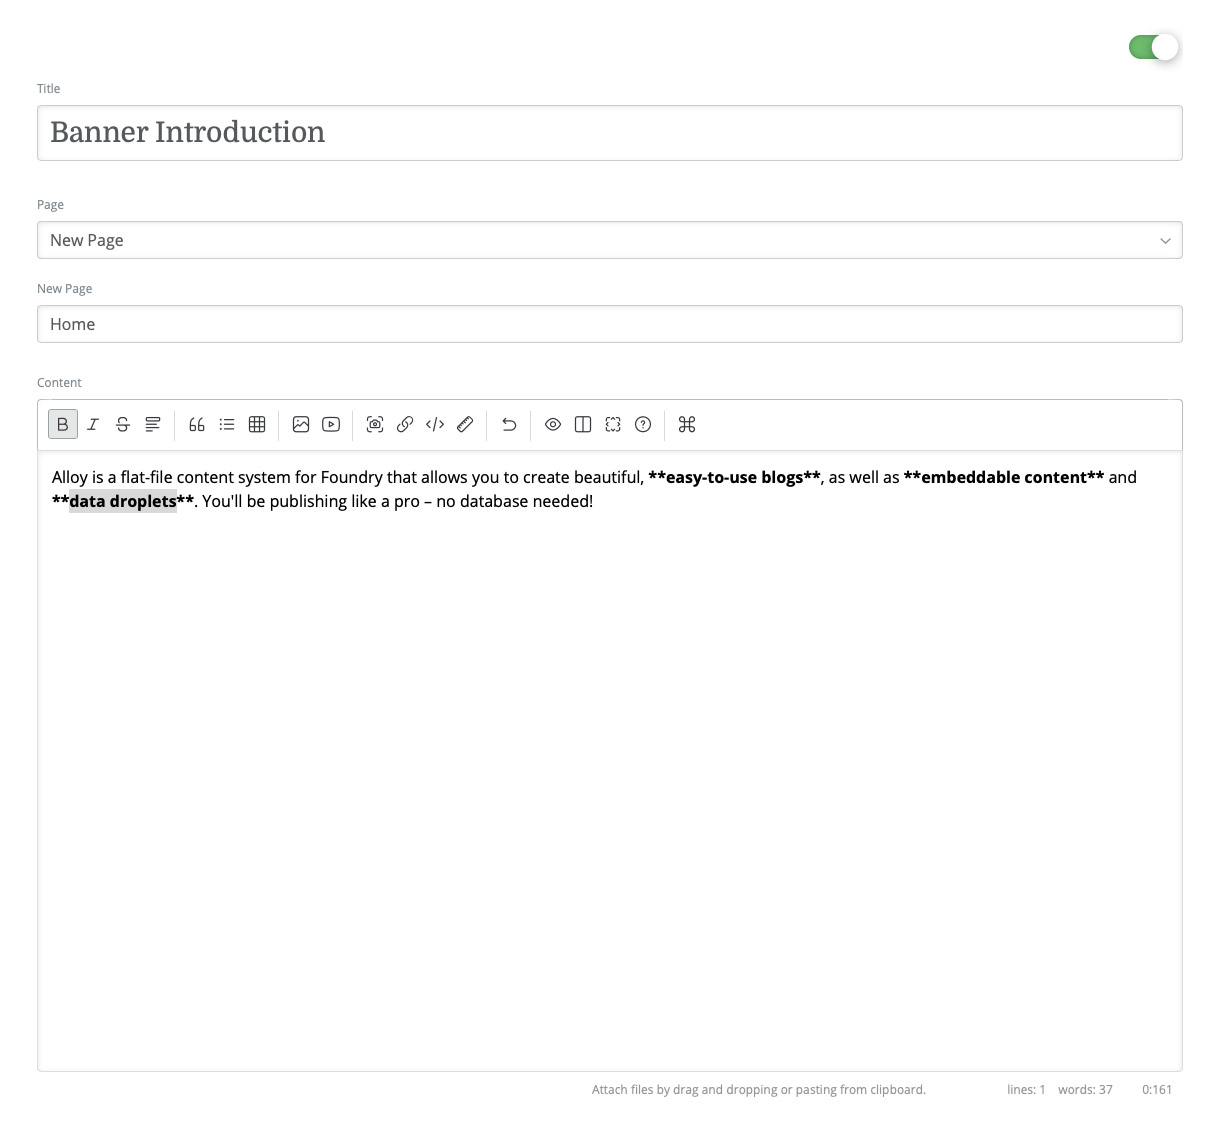
Each Embed has an Active toggle at the top right. When enabled the Embed is active and its content will be shown on the page where it has been embedded. If at any point you'd like to disable the content and hide it from view on your live page just disable the Embed using this toggle and the Embed contents will not show up on the live page.
TITLE
This field is used for our own organizational purposes. This title won't be displayed on our live site with the Embed. It is only meant for use in the Embeds list, and in Stacks Edit Mode, so that we know what kind of content is contained within the Embed.
The filename for your Embed will be created based off of your Title when initially adding your Embed in the Editor. You can however change this file name when editing an Embed.
IMPORTANT: We highly suggest that you change the filename before you insert the Embed into your RapidWeaver project file. Changing the filename after it has been added to your Stacks page will break the link and you'll have to re-embed the stack.

The Filename field is only shown when editing existing Embeds. To edit a filename first click the lock button to unlock the existing Embed's filename.
PAGE
The Page field is yet another organizational tool for the Embeds List view. This allows us to categorize our Embeds so we know where they show up within our site. By default we call this organizational tool "Pages" but you can use this to sort your Embeds into any sort of category system you like.
When creating an Embed you can select from an existing Page or select "New Page" to create a new Page category. When you select "New Page" you'll be given a field to add your page name as well.
CONTENT
This section is where the magic happens. This field is a lot like the main content area of our Blog Posts. In fact just about anything you can add and do in a Blog Post's main content area you can do here as well. Add headers, lists, images, and more.
Just like with Blog Posts the Content section of the Embed uses Markdown. This provides a quick, smooth writing workflow. If you're not familiar with Markdown we provide a Markdown Cheatsheet here on the Alloy site as well as an extensive Markdown reference tool right from the Editor's toolbar.

The Editor toolbar provides quick access to Markdown formatting, and more.
While the editor uses Markdown for its content, we also offer a powerful toolbar to make things simple and easy for everyone. The toolbar creates the Markdown for you. If you new to Markdown this is a great was to start to learn the basics.
The toolbar allows us to format text, upload images, create YouTube embeds and so much more! It also allows you the ability to preview your Embed's contents right in the editor. You're also able to write in side-by-side or full-screen mode -- whatever makes things easiest for you.
The toolbar's contents are configurable within the Editor stack's settings in RapidWeaver. Customize what buttons will be seen in the toolbar and republish to get the tools you want.
Stack Settings
Once you've dragged and dropped an Embed onto your RapidWeaver page you'll have some settings within the stack that you can use to customize its content. Let's look at those settings"
SHOW EMBED URL
When enabled this feature will show the URL that Alloy created, to link your Embed to your project, when you dragged and dropped it into your project file. This is purely referential.
CUSTOM FONT SIZE
Turning on this feature gives you the ability to adjust the font size for the Embed content at each of the three responsive breakpoints.
FONT
Choose to use the Foundry Control Center provided font or use the Typeface font selections to pick a font family for this Embed's contents.
FONT WEIGHT
Allows you to control the weight, or boldness, of the font when using a Typeface based font.
CUSTOM FONT COLOR
Allows you to adjust the color of the text within the Embed.
FONT (Header)
Choose to use the Foundry Control Center provided font or use the Typeface font selections to pick a font family for this Embed's headers.
FONT WEIGHT (Header)
Allows you to control the weight, or boldness, of the font when using a Typeface based font for your Headers within this Embed.
CUSTOM FONT COLOR (Header)
Allows you to adjust the color of the Headers within the Embed.
ROUNDED CORNERS (Images)
This setting adjusts the border radius, or roundness of the corners, of the images within this Embed stack.
ALIGNMENT
Adjusts the alignment of this Embed's contents. You can adjust it uniformly for all breakpoints or provide an unique alignment for each of the three responsive breakpoints.
FILE URL
This ADVANCED field allows you to alter the URL of the Embed you've placed on your page. This should only be changed if you know what you're doing, and why you're doing it. Changing this URL without knowledge of how to do so or why can result in your Embed not working!
