Installation
Getting Started
Installing Alloy inside RapidWeaver is amazingly easy. A little drag-and-drop and we're done. Below we walk you through the few simple steps for installing your new stacks.
Drag-and-Drop
When you purchase Alloy you receive a DMG file that contains both the Alloy stack as well as a folder of extra content. For installation you're going to need to have that DMG file on hand, and Stacks installed in RapidWeaver.
With those things taken care of, let's dive in and get Alloy installed.

Drag-and-Drop
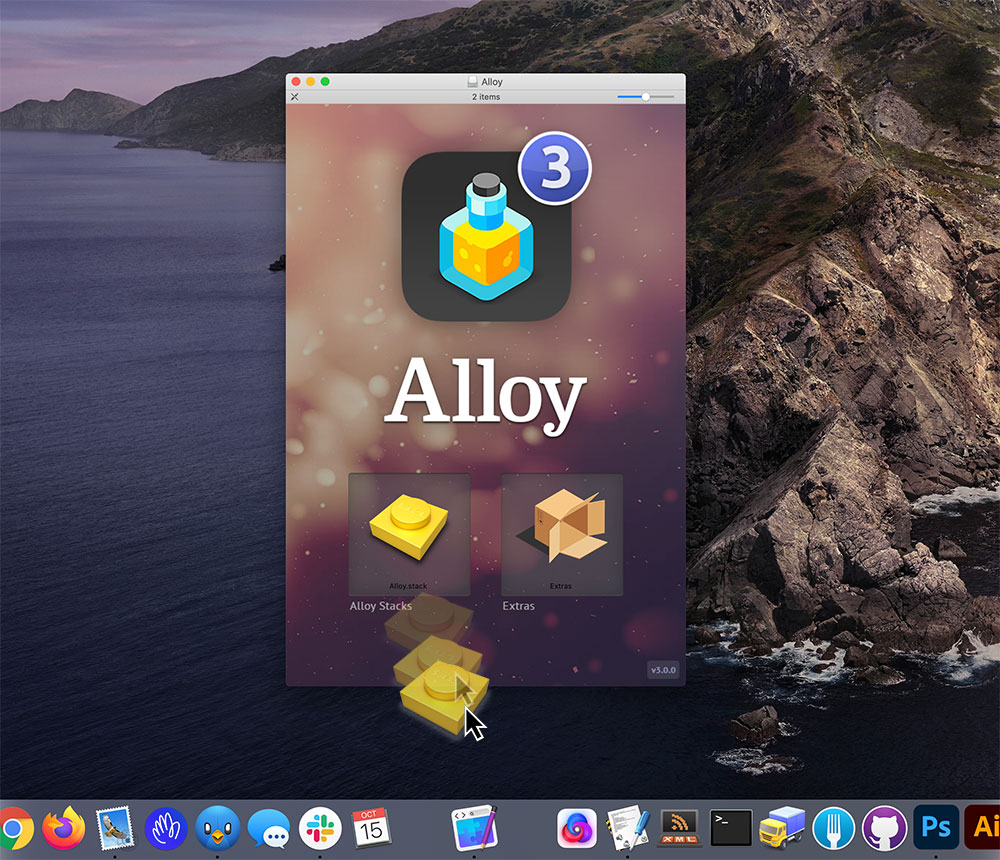
After opening the Alloy.dmg file you received with your purchase you should have a window that looks like this. Simply drag the Alloy.stack file onto the RapidWeaver icon in your macOS Dock and RapidWeaver does all of the installation.
After installing Alloy, simply quit and the restart RapidWeaver and you're ready to begin the Quick Start setup of your Editor.
We've got a tutorial video above that walks your through installation as well.
Piece of cake
That was easy right? With Alloy installed in our Stacks library we can start setting up our Editor page and credentials and start working with our Blog Posts, Embeds and Droplets.
When you're done installing Alloy in RapidWeaver and ready to setup your Editor, the hub of your blog and content management, head over to the Quick Start page and we'll get your Editor setup and ready to go.

