Pretty URLs
Configuration
Some people prefer to have what is commonly known as pretty URLs for their Blog Posts. In this section we look at what they are and how to set them up in Alloy and RapidWeaver.
To configure Pretty URLs we will need to modify our server's hidden .htaccess file. This may be scary to some users. If you're uncomfortable messing around with configuring your .htaccess file I would encourage you to skip this setup and continue using the standard Alloy Blog Post URL structure.
What are Pretty URLs?
Normally Alloy links to Blog Posts using a blog post ID in the URL structure. This is a pretty standard way of linking to things such as blog posts. A standard Blog Post URL in Alloy might look something like this normally:
https://www.mywebsite.com/blog/?id=organize-your-photos-with-ease
Some people don't like seeing the "?id=" in the URL however and would rather the Blog Post's slug be used more like a folder name. This is where Pretty URLs come into play. With Pretty URLs the Blog Post URL seen above would look like this instead:
https://www.mywebsite.com/blog/organize-your-photos-with-ease
While doesn't look like much of a change on the surface, there's actually a good deal going on underneath to make this happen, both on your server and within Alloy itself. Below we'll look at configuring Alloy and your server to handle these Pretty URLs.
Starting Point

Our first step is to enable Pretty URLs within Alloy's main Control Center stack. When doing so we'll notice there's a warning that accompanies the checkbox that enabled Pretty URLs. It let's us know that we're going to need to modify our .htacess file.
When we enable this check box we will also receive a large warning message in our Stacks page reminding us that we need to setup our .htacess file. We don't mean to go overboard, but it is important that this be configured properly for Pretty URLs to work.
When enabled we'll then be presented with some more information within the settings palette of the Alloy stack. The first thing we're presented with is this message:
- Copy & paste this code into your .htaccess file in Publishing Settings using the Edit .htaccess File button.
Modifying our .htaccess file
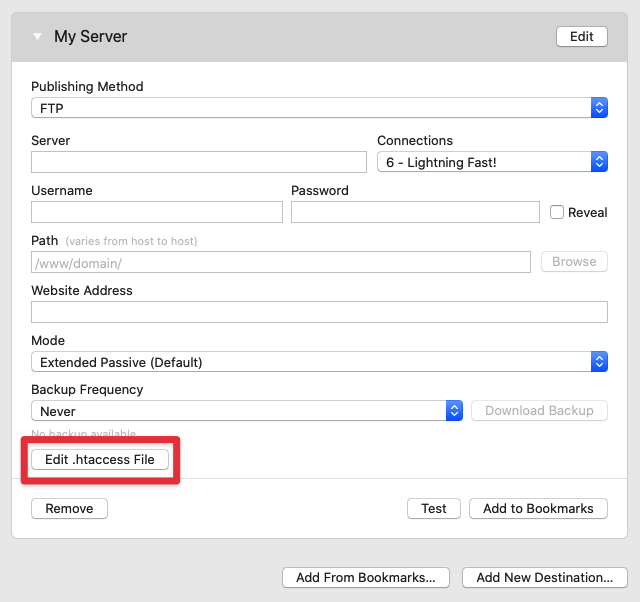
The button that this message is referring to is found in RapidWeaver's Publishing Setup screen. When you click this button RapidWeaver opens an FTP connection to your server to edit the htaccess file. For this reason you will need to have properly configured your server settings before editing your htaccess file. If you've not configured your publishing setup yet, now is the time to do so.

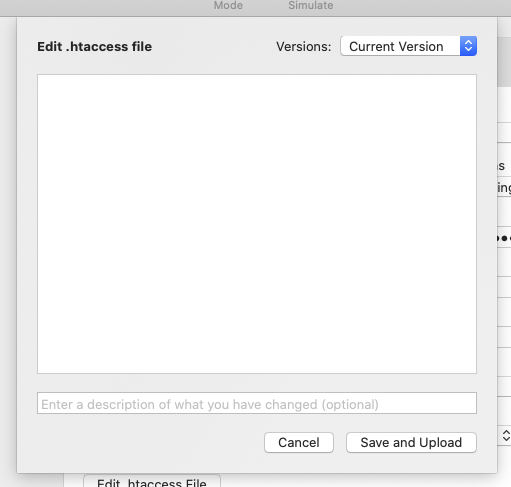
After clicking the Edit .htaccess File button you'll be presented with a window, as seen below, where you'll be editing your .htaccess file's contents:

One of the nice things about using RapidWeaver to edit this file is that it keeps past versions of the file on hand in the event you need to revert to an older version.
Looking at the Alloy controls again we see we're given some code to copy and paste into the .htaccess file, below. This code will require two changes though to customize it for your site.
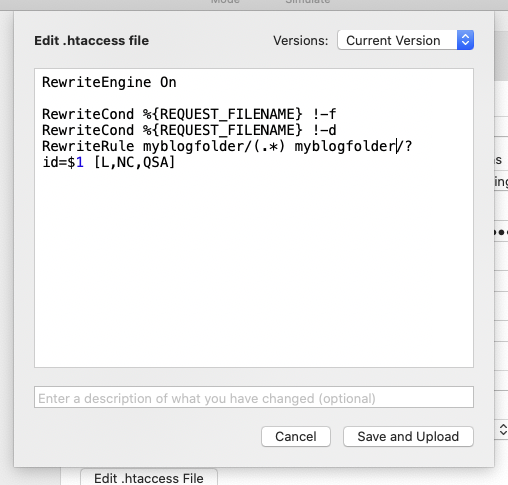
In the code above you'll notice two instances of blog/ within the snippet. We need to modify these to be the name of your blog's folder. Most blogs will be a top level page and thuse you'll only need to replace blog/ with your blog folder name, like so: myblogfolder/
If you've nested your blog within another page you'll also need to include that folder name within your relative URL. An example of that might be: parentfolder/blogfolder/
This second example is not common however. It is more likely that you'll only need to substitue the blog/ for your own blog's folder name. Note that this is case sensative.
Once we've pasted the code snippet into the .htaccess file field, and made our folder name substitution, as seen below, we can then click the Save and Upload button to apply these changes to our server.

Final Steps
Our final step before republising our site is to get rid of that annoying warning message. You'll find a checkbox below the code snippet in the Alloy Control Center stack that is labeled "Have you modified .htaccess file?"
If you have modified the .htaccess file and uploaded the changes to the server check this box and the large warning message in RapidWeaver will go away.
Once we've disabled the warning message we just need to republish. when you republish your blog next it is not a bad idea to use RapidWeaver's "Republish All Files" feature just to ensure we've got everything updated.
Conclusion
The setup of Pretty URLs is an aesthetic choice. The functionality of your blog will remain the same. Blog Posts are still accessed, created and maintained the same way. We're just instructing your server and Alloy to change the URL structure a bit.
If you're uncomfortable modfying your .htaccess file, please skip this optional setting.

